Wednesday, November 20, 2024

High-Demand Cutting Board Projects for Beginners to Sell

High-Demand Cutting Board Projects for Beginners to Sell

High-Demand Cutting Board Projects for Beginners to Sell: A Woodworking Journey

Hey there, woodworking enthusiasts! Are you ready to dive into the world of crafting beautiful and functional cutting boards? Let's face it, everyone needs a good cutting board, and you can turn this everyday necessity into a profitable side hustle or even a full-time business.

Why Cutting Boards are a Great Choice for Beginners

Let's be real, woodworking can feel a little intimidating, especially when you're just starting out. But cutting boards are a fantastic project for newbies because:

  • They're relatively small and manageable: No need to wrestle with huge slabs of wood, making it easier to handle and manage.
  • The process is straightforward: There are a lot of great tutorials available to guide you through the steps.
  • They offer endless customization possibilities: Different wood species, shapes, sizes, and finishes create unique and appealing pieces.
  • They're in high demand: Everyone needs cutting boards, making them a popular and readily marketable product.

Think about it: Imagine turning a simple piece of wood into something beautiful and functional, something that can add a touch of handcrafted charm to any kitchen. That's the magic of woodworking, and cutting boards are a great way to experience it.

High-Demand Cutting Board Ideas to Get You Started

Now, let's get down to the exciting part: picking the cutting board projects that will make your customers drool! Here are some of the most popular styles to consider:

1. Classic Rectangular Cutting Board

The tried and true, the classic rectangular cutting board is a must-have for any kitchen. Its simple design makes it easy to work with, and it's incredibly versatile. You can offer it in different sizes, choose from a variety of woods, and even add a juice groove for capturing those messy drips.

2. End Grain Cutting Board

End grain cutting boards are known for their durability and knife-friendliness. They're created by using wood with the grain perpendicular to the surface, which makes them resistant to scratches and dulling. The unique pattern and appearance of end grain boards make them a highly sought-after item.

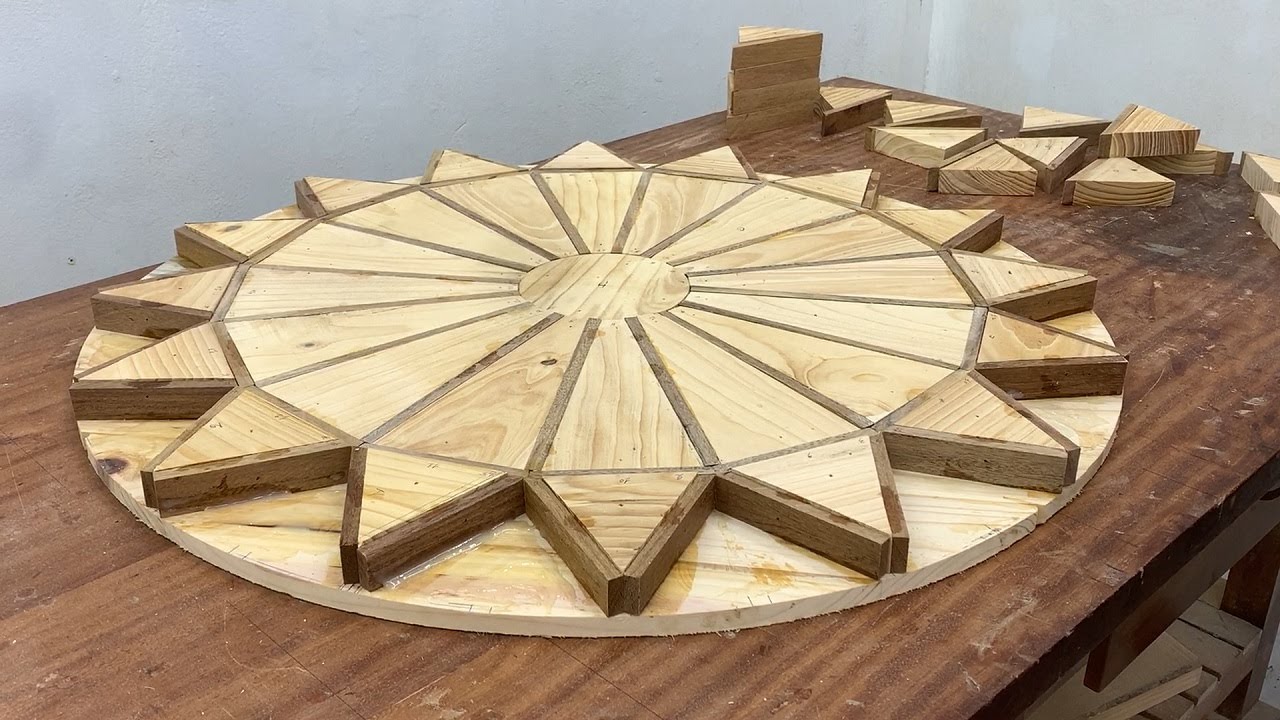
3. Round Cutting Board

Looking for something a bit more unique? A round cutting board adds a touch of elegance to any kitchen. They're perfect for serving charcuterie boards, pizzas, or even as a decorative centerpiece. The circular design adds a touch of whimsy to your product line.

4. Cheese Board

Cheese boards are a popular addition to any kitchen, allowing you to serve cheese, crackers, and other snacks in style. You can design these boards with different compartments for various cheese types, include a built-in knife holder, or even add a cutting surface.

5. Cutting Board with Handle

Adding a handle to your cutting board makes it easier to move and carry. This is a great option for serving boards or for those who need a little extra leverage when chopping. You can create a variety of handle styles, from classic to modern.

Essential Tips for Creating Cutting Boards

Alright, you've chosen your cutting board project. Now, let's make sure you have the tools and knowledge to succeed! Here are some must-have tips to help you create cutting boards that will impress:

1. Choose the Right Wood

Not all wood is created equal when it comes to cutting boards. You want wood that's hard, durable, and resistant to moisture and bacteria. Popular options include:

  • Hard Maple: A strong, durable choice with a beautiful grain pattern.
  • Walnut: Known for its rich color and unique grain patterns.
  • Cherry: A beautiful, reddish-brown wood with a warm tone.
  • Oak: Strong and durable, with a distinct grain pattern.
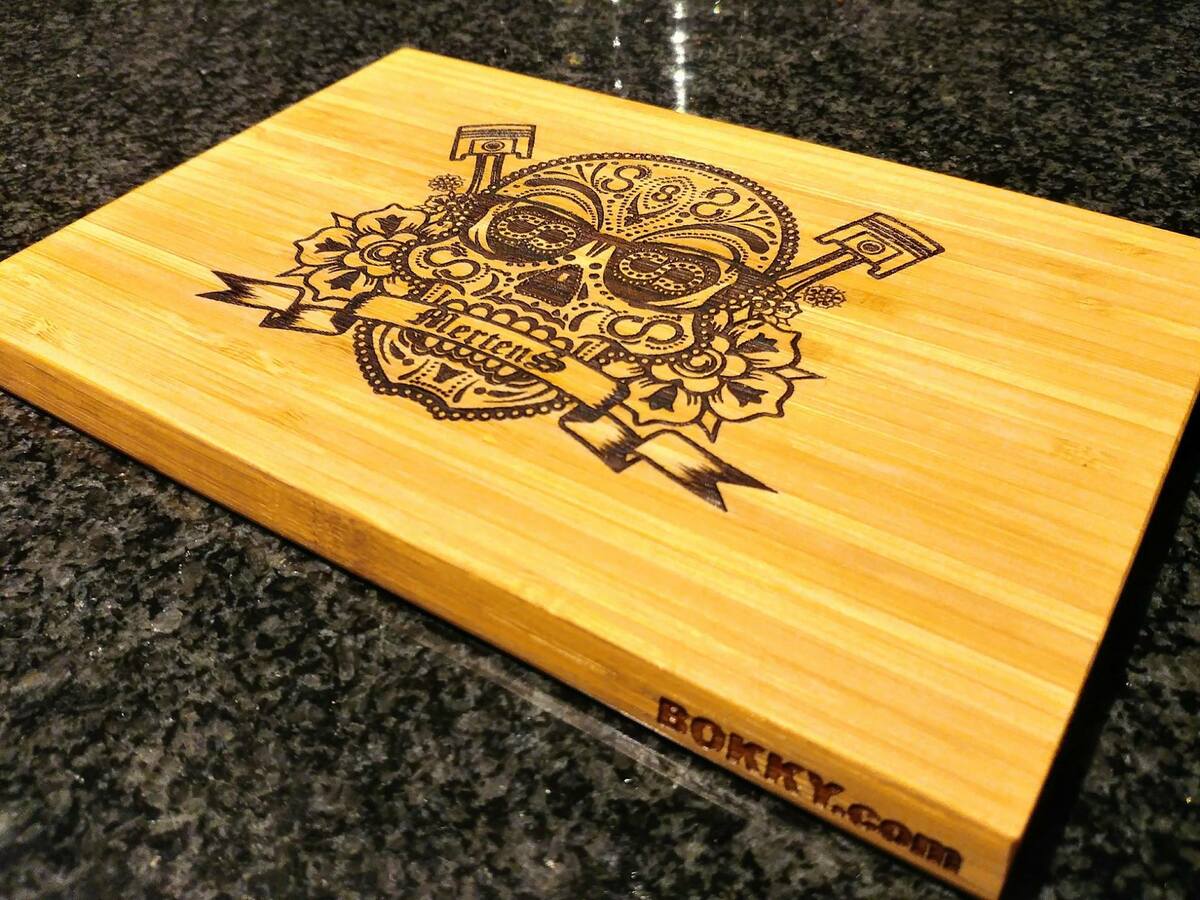
  • Bamboo: A sustainable and eco-friendly option that's naturally antibacterial.

2. Use Safe Wood Glue

When you're building cutting boards, using wood glue is essential for creating strong, durable bonds. Always use a waterproof, food-safe wood glue.

3. Apply a Food-Safe Finish

After sanding, it's time to protect your cutting board with a food-safe finish. This will help prevent moisture absorption, protect the wood from scratches, and make cleaning easier. You can choose from:

  • Mineral Oil: A classic and easy-to-apply finish that's food-safe.
  • Beeswax: Adds a natural sheen and protection to the wood.
  • Food-Safe Polyurethane: Creates a durable, water-resistant finish.

4. Sanding is Key

Sanding is a crucial step in creating a smooth and beautiful cutting board. Use progressively finer grit sandpaper to achieve a polished finish. Don't forget to round the edges to prevent splinters.

5. Promote Your Products

Once your beautiful cutting boards are ready, it's time to showcase them to the world! Create a professional online presence through a website or social media accounts to reach a wider audience. You can also participate in craft fairs or local farmers' markets to connect with potential customers face-to-face.

Commonly Asked Questions About Cutting Boards

You're ready to jump into the world of cutting boards, but you might have some questions. Here are some common ones, and the answers you need:

1. How do I choose the right wood for my cutting board?

The best wood for cutting boards is hard, durable, and resistant to moisture and bacteria. Hard maple, walnut, cherry, oak, and bamboo are all excellent choices. Consider the appearance, durability, and budget to find the perfect wood for you.

2. What kind of finish should I use?

Choose a food-safe finish that's durable and protects the wood. Mineral oil, beeswax, and food-safe polyurethane are all popular options.

3. How do I care for my cutting board?

Regularly clean your cutting boards with warm, soapy water and dry them thoroughly. Apply a fresh coat of mineral oil or beeswax as needed to keep the wood hydrated and protected.

4. How much can I sell my cutting boards for?

The price of your cutting boards will depend on the size, wood type, and complexity of the design. Research what similar cutting boards are selling for online and at craft fairs to get an idea of what you can charge.

There you have it! A guide to creating high-demand cutting boards and turning your woodworking passion into a profitable venture. Remember, start small, learn as you go, and never stop experimenting. Good luck, and happy crafting!

How to Craft a Wooden Blanket Ladder with a Modern Touch

How to Craft a Wooden Blanket Ladder with a Modern Touch

How to Craft a Wooden Blanket Ladder with a Modern Touch

Alright, let's talk about blanket ladders. They're not just practical, they're a statement piece in your living room, bedroom, or even your bathroom. But let's face it, the traditional blanket ladders can sometimes feel a little, well, farmhouse-y, right? Today, we're going to give that classic design a modern makeover. We're talking sleek lines, minimalist vibes, and maybe even a touch of industrial flair. Ready to get your hands dirty (and maybe a little sawdust on your clothes)?

This project is perfect for DIY beginners, but if you're a seasoned woodworker, you'll appreciate the chance to put your skills to the test and create a unique piece for your home. So, let's dive in!

Gather Your Supplies

First things first, you need the right tools and materials. Don't worry, you probably already have some of these laying around. But just in case, here's a checklist:

  • Wood â€" You'll need two pieces of sturdy wood for the sides of the ladder. Pine, oak, or even reclaimed wood would work great. Aim for a thickness of at least 1 inch (2.5 cm) and a width of 4-6 inches (10-15 cm).
  • Wood for the rungs â€" You'll need 3-5 pieces of wood for the rungs, depending on how tall you want your ladder to be. Choose a thickness that looks proportional to the sides of the ladder.
  • Screws â€" Make sure they're long enough to secure the rungs to the sides without going through the other side.
  • Wood glue â€" A strong wood glue will help reinforce the joints.
  • Staining or Painting Supplies â€" You're going for a modern look, so think about what color you want to use.
  • Measuring tape
  • Level
  • Saw (a circular saw or a jigsaw will work)
  • Drill
  • Clamps
  • Sandpaper
  • Safety glasses
  • Dust mask (optional but recommended)

Planning Your Design

Now, let's get into the fun part: planning the design! This is where you get to express your unique style and really make the ladder your own.

Size and Shape

Think about where you want to place your ladder and what size will work best. Do you want it to be tall and narrow, or short and wide? Maybe you want to create a corner ladder with a unique shape.

For standard-sized blankets, a ladder around 4-5 feet (1.2-1.5 meters) tall is a good starting point. But feel free to adjust based on your needs and your space.

Rungs

When it comes to the rungs, get creative. Here are a few ideas:

  • Classic: For a clean, minimalist look, keep the rungs simple and straight.
  • Staggered: Alternate the placement of the rungs, creating a more dynamic and interesting pattern.
  • Angle it: Give the rungs a slight angle to create a more modern vibe. Think of a leaning tower of Pisa type of feel.
  • Rounded: Round the edges of the rungs for a softer touch.
  • Industrial: Use metal pipes or rods for the rungs to add an industrial feel.

Finishing Touches

You can take your blanket ladder to the next level with some finishing touches:

  • Metal accents: Add metal brackets or even a metal top piece to give it an industrial feel.
  • Painted details: Use contrasting paint colors or stencils to add a personal touch.
  • Leather straps: Add leather straps to hold the blankets in place and add a touch of rustic charm.

Building Your Blanket Ladder

Alright, let's get down to business and build this beauty. Follow these steps:

  1. Cut the Wood: Measure and cut the sides of your ladder to the desired length. Cut the rungs to the desired width and length. You can mark the rungs with a pencil before cutting to ensure even spacing.
  2. Sanding: Before you start assembling, sand all the wood pieces to a smooth finish. This will make your ladder look polished and feel nice to the touch.
  3. Assemble the Rungs: Decide on the spacing for your rungs and mark the placement on the sides of the ladder. Apply wood glue to the ends of the rungs and carefully clamp them in place. You can also use screws to secure the rungs.
  4. Secure the Rungs: Pre-drill holes for the screws to avoid splitting the wood. Then, carefully screw the rungs into place. Be sure to use a level to make sure your ladder is perfectly straight.
  5. Finishing Touches: Once the ladder is assembled, sand it again to remove any rough spots or imperfections. Apply stain or paint to your preference.
  6. Let it Dry: Allow the stain or paint to dry completely before moving on.
  7. Safety Tips

    While building your blanket ladder is a fun project, it's important to prioritize safety. Remember to:

    • Wear Safety Glasses: Protect your eyes from flying wood chips and sawdust.
    • Use a Dust Mask: This will help you avoid inhaling dust, especially if you are working with wood that has been treated with chemicals.
    • Secure Workpiece: Always clamp the wood to your workbench to prevent accidents.
    • Sharp Tools: Use sharp tools and keep them in good working condition. Dull tools are more likely to slip and cause injuries.
    • Take Breaks: It's important to take breaks to avoid fatigue and maintain focus.

    Ideas to Make Your Ladder Unique

    Think outside the box! Here are some additional ideas to make your ladder stand out:

    • Floating Shelves: Add floating shelves to the ladder for additional storage. You can display plants, books, or decorative items.
    • Add a Mirror: Hang a mirror on the back of the ladder for a visually interesting statement.
    • Light it Up: Integrate LED lights into the ladder to create a warm and inviting ambiance.
    • Use Rope: Replace the rungs with rope to create a nautical feel.
    • Get Creative with Colors: Experiment with different paint colors or staining techniques to create a unique look.

    Commonly Asked Questions

    Here are some questions that people often have about building a blanket ladder:

    • What kind of wood should I use? Pine is a budget-friendly option, oak is a durable choice, and reclaimed wood can give your ladder a unique character.
    • How do I choose the right size? Measure the space where you plan to place the ladder and then choose a size that works best.
    • Can I paint the ladder? Absolutely! You can paint it any color you like, or you can stain it for a more natural look.
    • How do I make sure the ladder is sturdy? Use strong wood glue and make sure the rungs are properly secured with screws.
    • Can I use this ladder for anything else besides blankets? You can use it to display towels, books, or even plants.

    Building a blanket ladder is a rewarding project that you can be proud of. It's an opportunity to get creative and personalize your home. So, go for it! With a little bit of time and effort, you can craft a beautiful and functional piece that you'll love for years to come. Happy building!

Tuesday, November 19, 2024

How to Make Wooden Benches That Work for Entryways and Mudrooms

How to Make Wooden Benches That Work for Entryways and Mudrooms

Creating Functional and Stylish Wooden Benches for Entryways and Mudrooms

Entryways and mudrooms are often the first and last impressions of your home, so it's essential to create a welcoming and practical space. A wooden bench can be a valuable addition, providing seating, storage, and a place to organize shoes and belongings. This article will guide you through crafting beautiful and functional wooden benches for your entryway or mudroom.

Planning Your Bench

Before embarking on your woodworking project, careful planning is essential.

Determine Size and Style

Consider the available space, the number of people you need to accommodate, and the overall style of your home.

  • Dimensions: Measure the area where you want to place the bench. Consider the width, depth, and height to ensure it fits comfortably and doesn't obstruct traffic flow.
  • Style: Research different bench designs. You can choose from simple, traditional styles, contemporary minimalist designs, or more elaborate options. Choose a style that complements the existing decor.

Material Selection

Choose durable wood that will stand up to daily use and potential moisture.

  • Hardwoods: Oak, maple, cherry, and walnut are strong and beautiful choices. They offer excellent durability and can be stained or painted to your liking.
  • Softwoods: Pine and cedar are more budget-friendly options. They are lightweight and easy to work with but might require additional care to protect them from scratches and dents.
  • Reclaimed Wood: Adding reclaimed wood gives character and sustainability to your project. It often features unique patterns and textures.

Features and Functionality

Think about the specific functions you want your bench to serve.

  • Storage: Include built-in shelves, drawers, or baskets beneath the seat for storing shoes, coats, and other items. Consider adding a drop-down door or a hinged seat for easy access.
  • Hooks: Install coat hooks or pegs on the back of the bench for hanging jackets, bags, or scarves.
  • Cushioning: Choose comfortable padding for the seat. You can use foam, pillows, or a custom-made cushion.

Construction and Materials

Once you have your plan finalized, you can start assembling your bench. You'll need the following tools and materials:

Tools

  • Saw (circular, miter, or table saw)
  • Drill
  • Screwdriver
  • Measuring tape and ruler
  • Level
  • Clamps
  • Sandpaper
  • Wood glue
  • Safety glasses and gloves

Materials

  • Wood boards (dimensions based on your design)
  • Screws or nails
  • Wood stain or paint (optional)
  • Finishing oil or sealant (optional)
  • Hardware (hinges, drawer slides, hooks, etc.)
  • Cushioning (foam, pillows, or fabric)

Building the Bench

Follow these steps to build a sturdy and attractive wooden bench:

1. Cut the Wood

Use your chosen saw to cut the wood boards to the exact dimensions specified in your plan. Measure carefully to ensure accurate cuts.

2. Assemble the Base

Join the wood boards to create the base of the bench. Use screws or nails to secure the joints, making sure they are aligned and flush.

3. Attach the Legs

Attach the legs to the base. Use wood glue and screws for a strong bond. Ensure the legs are level and at the desired height.

4. Build the Seat

Create the seat frame by joining wood boards together. You can make it solid or add slats for a more rustic look. Secure the seat frame to the base.

5. Add Storage (Optional)

If you're incorporating storage, assemble the shelves, drawers, or baskets according to your plan. Secure them beneath the seat frame.

6. Install Hooks (Optional)

Attach coat hooks or pegs to the back of the bench for hanging items. Make sure they are sturdy and securely fastened.

7. Sand and Finish

Sand the entire bench using progressively finer grit sandpaper to achieve a smooth finish. Apply wood stain, paint, or a sealant to protect the wood and enhance its appearance. Let the finish dry completely.

8. Add Cushioning

Place cushions, pillows, or padding on the seat for comfort. Choose materials that complement the style of your bench and your entryway or mudroom.

Tips for Success

  • Plan and Measure Carefully: Accurate measurements and careful planning will result in a well-fitting and attractive bench.
  • Use Quality Wood: Investing in durable wood will ensure your bench lasts for years to come.
  • Reinforce Joints: Use wood glue and screws or nails for strong and secure joints.
  • Sand Smoothly: Thorough sanding creates a smooth, even surface for your finish.
  • Choose a Suitable Finish: Select a wood finish that complements your style and offers protection against wear and tear.
  • Add Personal Touches: Customize your bench with decorative hardware, unique wood choices, or personalized details.

Conclusion

Building a wooden bench for your entryway or mudroom is a rewarding project that adds both functionality and style to your home. By carefully planning, choosing quality materials, and following the steps outlined above, you can create a piece of furniture that will enhance your entryway and serve your family for years to come. Remember to enjoy the process, take your time, and personalize your bench to reflect your unique taste and style.

Monday, November 18, 2024

Christmas Wood Crafts Using Scrap Wood

Christmas Wood Crafts Using Scrap Wood

Christmas Wood Crafts Using Scrap Wood: Festive Fun on a Budget

It’s that time of year again â€" the air is crisp, the leaves are falling, and the smell of pumpkin spice is wafting through the air. You know what that means? Christmas is just around the corner!

While we all love the magic of Christmas, it can also be a bit of a financial drain. That’s why I’m here to show you how to craft beautiful and unique Christmas decorations using scrap wood, turning those leftover bits and pieces into festive treasures!

Not only is this a great way to save some money, but it also lets you get creative and personalize your holiday decor. Plus, there's something incredibly satisfying about transforming scrap wood into something beautiful and meaningful.

Gather Your Supplies

Before you get started, you'll need to gather a few basic supplies. Don't worry, most of these are probably already hanging around your garage or shed!

  • Scrap wood of various sizes and shapes
  • Sandpaper (various grits)
  • Wood glue
  • Saw (hand saw or jigsaw)
  • Drill and drill bits
  • Paint or stain (your choice!)
  • Paintbrushes
  • Optional: Stencils, embellishments, glitter, etc.

Simple and Stunning Christmas Ornaments

Let’s start with some easy-to-make ornaments that are perfect for adding a touch of rustic charm to your tree.

Wooden Star Ornaments

These stars are a classic and always look beautiful on a Christmas tree.

  1. Cut out star shapes from your scrap wood using a jigsaw or a hand saw.
  2. Sand the edges of the stars smooth.
  3. Paint the stars with your chosen colors. You can even add some glitter for extra sparkle!
  4. Drill a small hole at the top of each star for hanging.
  5. Tie a ribbon or string through the hole for hanging.

Wooden Snowflake Ornaments

Snowflakes add a delicate touch to your tree.

  1. Cut out snowflake shapes from thin scrap wood.
  2. Sand the edges and any rough spots.
  3. Paint the snowflakes white or use a natural wood stain for a rustic look.
  4. Drill a small hole at the top of each snowflake and attach a string or ribbon.

Rustic Christmas Village

Want to add a touch of whimsy to your holiday decor? Create a charming little Christmas village using scrap wood.

Crafting Tiny Houses

Imagine a cozy cottage with a chimney and a warm glow coming from the window.

  1. Cut out basic house shapes from scrap wood.
  2. Glue together the walls and roof of the house.
  3. Create a chimney using a small piece of wood or cardboard.
  4. Sand all surfaces smooth.
  5. Paint the houses in festive colors like red, green, and white.
  6. Add details like windows, doors, and snow-covered roofs with paint or felt.
  7. Place the houses on a wooden base or a piece of foam board.

Creating the Village Setting

Don't forget to add those magical touches to make your village truly special.

  • Add a small Christmas tree to your village scene, crafted from a twig or a small piece of wood.
  • Use glitter glue or white paint to add snow to the ground and roofs.
  • Include tiny figures or animals to add life to your village.
  • Add a miniature wooden fence or a bridge to your village scene to add depth and interest.

Charming Wooden Christmas Tree

A wooden Christmas tree is a unique and beautiful alternative to a traditional tree.

  1. Cut out a triangle shape from plywood for the base.
  2. Create the tree branches using smaller pieces of scrap wood.
  3. Glue the branches to the base, starting from the bottom and working upwards. Try to stagger the branches for a natural look.
  4. Sand the entire tree smooth.
  5. Paint the tree in a festive color like green or white.
  6. Decorate the tree with ornaments, lights, or even small wooden reindeer.

Beyond Decorations: Useful Christmas Wood Crafts

Let’s get practical. Scrap wood can also be used to make useful items that will add a touch of holiday cheer to your home.

Wooden Gift Tags

Want to add a personal touch to your gifts this year?

  1. Cut out simple rectangular shapes from scrap wood.
  2. Sand the edges smooth.
  3. Paint or stain the tags in your favorite colors.
  4. Write your message on the tag using a permanent marker.
  5. Punch a hole in the top and tie a ribbon or string for hanging.

Wooden Utensil Holders

A wooden utensil holder is a useful and decorative addition to your kitchen.

  1. Cut out a rectangular shape from a piece of scrap wood to create the base of your holder.
  2. Cut out smaller rectangular shapes from scrap wood and glue them together to create the sides of the holder.
  3. Sand the entire holder smooth.
  4. Paint or stain the holder in your chosen color.

Safety First

Remember, always be cautious when working with tools and be sure to wear safety goggles and gloves. Use a clamp to hold the wood securely in place while cutting to prevent kickback.

Let Your Creativity Shine

The possibilities are endless when it comes to crafting with scrap wood! These are just a few ideas to get you started. Let your imagination run wild and create your own unique Christmas masterpieces.

Commonly Asked Questions

Q: What types of wood are best for crafting?

A: You can use a variety of wood types for crafting, but softer woods like pine, fir, and balsa wood are generally easier to work with. Hardwood like oak and maple can be more challenging to cut and sand.

Q: How do I make the wood smooth?

A: Use sandpaper in progressive grits. Start with a coarser grit to remove any rough edges and then move to finer grits for a smoother finish.

Q: How can I personalize my wood crafts?

A: There are many ways to personalize your creations. You can paint them in different colors, add embellishments like ribbons, buttons, or glitter, or use stencils to create patterns. Get creative and let your personality shine through!

Q: What can I do with leftover scraps?

A: Don’t throw them away! Use the leftover pieces for smaller crafts, like ornament hangers or even small gifts for friends. You can even create a mosaic pattern by gluing smaller scraps together.

So, gather your scrap wood, put on your creative hat, and let’s turn those leftover bits into festive treasures! Happy crafting!

Wednesday, November 13, 2024

How to Build Coffee Tables with Unique Materials for an Extra Special Touch

How to Build Coffee Tables with Unique Materials for an Extra Special Touch

How to Build Coffee Tables with Unique Materials for an Extra Special Touch

Alright, so you're ready to take your coffee table game to the next level. You want something truly unique, a statement piece that makes your living room feel like *your* living room. Forget the boring IKEA coffee table â€" it's time to unleash your inner DIYer and build something special. And trust me, using unique materials is the key to unlocking that extra special touch.

Don't worry, you don't need to be a seasoned carpenter to build a coffee table masterpiece. With a little creativity, some basic tools, and a willingness to embrace the unexpected, you can build something truly eye-catching. Let's dive in and explore some unique materials and ideas for your next coffee table project!

Finding Your Inspiration: Uncommon Materials for a Coffee Table

The beauty of DIY is that you can use anything you can get your hands on! Think outside the box â€" wood, metal, and glass are the usual suspects, but there's a whole world of possibilities out there waiting to be discovered.

Beyond the Ordinary: Embracing Unique Materials

  • Reclaimed Wood: Giving old wood a second chance is a great way to add character to your coffee table. Think weathered barnwood, salvaged pallets, or even old window shutters. It's a sustainable choice that adds a rustic charm.
  • Industrial Metal: For a more modern vibe, industrial metal like steel or iron pipes is a fantastic option. You can create clean lines and geometric shapes that give your coffee table a sleek, contemporary feel. Don't be afraid to mix in metal with other materials for added visual interest.
  • Stone: Slate, marble, or granite can create a dramatic statement, adding a touch of sophistication to your living room. Just be prepared to handle these materials carefully. They can be heavy and might require special tools.
  • Upcycled Objects: Think outside the box â€" old suitcases, vintage records, even antique doors can be repurposed into unique coffee table tops. Let your imagination run wild!
  • Natural Elements: Embrace nature by incorporating elements like driftwood, river rocks, or even slices of tree trunks. These materials add a touch of nature's beauty to your living room.

Crafting Your Vision: Designing Your Coffee Table

Now that you've chosen your materials, it's time to bring your coffee table to life. Let's talk about design and construction:

Brainstorming Shapes and Styles

There are endless possibilities! Here are a few ideas to get you started:

  • Geometric Shapes: Go for a modern look with a coffee table that incorporates squares, circles, or triangles.
  • Round or Oval: Perfect for creating a welcoming and cozy feel in a room.
  • Rustic Farmhouse Style: Think chunky wood, distressed surfaces, and maybe even a few iron accents.
  • Industrial Chic: Use metal pipes, concrete, and exposed bolts for a raw and edgy aesthetic.
  • Minimalist: Keep things simple with sleek lines, clean edges, and a limited color palette.

Planning the Construction: Don't Be Afraid to Get Creative

Once you've got the design down, it's time to get practical. Consider these factors:

  • Size and Dimensions: Measure your space and decide on the right size and shape for your coffee table. You want it to be functional and visually appealing.
  • Materials and Tools: Make a list of everything you need, from lumber to screws to glue, and make sure you have the right tools for the job.
  • Finish: How do you want to finish your coffee table? Paint, stain, wax? Think about the overall style you're going for.
  • Safety First: Remember to follow safety guidelines when working with tools and materials.

Building Your Coffee Table: From Vision to Reality

Alright, you've got your materials, your plan, and you're ready to build! Let's break it down:

Step-by-Step Guide: A Coffee Table Construction Journey

  • Prepare Your Materials: Cut your wood to the desired sizes, sand any rough edges, and pre-drill holes where needed.
  • Assemble the Base: Whether it's a simple frame or a more complex structure, carefully assemble the base of your coffee table according to your plan. Use glue, screws, and clamps to secure everything firmly.
  • Attach the Top: Depending on your materials, you'll need to use the right method to attach the top. Screws, brackets, or even epoxy can work, depending on the weight and type of top you're using.
  • Finishing Touches: Sand down any rough spots and give your coffee table a final sanding. Apply paint, stain, or wax according to your chosen finish.
  • Time to Enjoy: Give your coffee table a good cleaning, let the finish dry, and admire your handiwork!

Tips for Unique and Eye-Catching Finishes

A unique coffee table deserves a unique finish. Here are some ideas to make your masterpiece truly stand out:

Finishing Touches: Adding the Extra Wow Factor

  • Distressed Finish: Create a rustic look by sanding down edges, adding paint chips, or even using a hammer to create texture.
  • Stencils or Decals: Add a touch of personality with stencils or decals to create patterns or designs on your coffee table.
  • Metallic Accents: Use gold, silver, or copper leaf to add a touch of luxury and sophistication.
  • Unique Hardware: Don't settle for boring hardware. Look for vintage knobs, industrial-style bolts, or even custom-made handles to add a unique touch.
  • Epoxied Details: For a truly one-of-a-kind look, consider using epoxy resin to embed objects like shells, flowers, or even photos into your coffee table.

Embrace the Unexpected: Let Your Creativity Shine

The beauty of a DIY coffee table is that you can personalize it in countless ways. Don't be afraid to experiment and let your imagination run wild! Here are a few more tips for making your coffee table truly unique:

Think Outside the Box: Unique Coffee Table Ideas

  • Add Storage: Make your coffee table functional by incorporating drawers, shelves, or a hidden compartment for storing remote controls, books, or other essentials.
  • Incorporate Lighting: Create a cozy ambiance by adding LED lights beneath the top or incorporating a built-in lamp.
  • Add Wheels: Make your coffee table easy to move around the room by attaching casters or wheels.
  • Use a Unique Shape: Instead of a traditional rectangle or square, consider a hexagonal, octagonal, or even a freeform shape for a truly distinctive look.

Remember, the best coffee tables are the ones that reflect your personal style. So don't be afraid to experiment, embrace imperfections, and have fun with the process! You'll be surprised by what you can create.

Wooden Serving Trays with Custom Handles and Designs to Sell

Wooden Serving Trays with Custom Handles and Designs to Sell

Crafting Wooden Serving Trays with Custom Handles and Designs

In the realm of home décor and hospitality, serving trays hold a special place. They add a touch of elegance to any gathering, whether it's a casual breakfast in bed or a formal dinner party. But what if your serving tray could be more than just functional? What if it reflected your unique style and personality? This is where custom wooden serving trays come in.

Imagine a tray crafted from exquisite wood, adorned with your favorite designs, and featuring custom handles that feel just right in your hands. The possibilities are endless, limited only by your imagination. In this article, we'll delve into the world of custom wooden serving trays, exploring the process of creating them, the diverse design options available, and the unique appeal they offer.

The Art of Customization

The beauty of custom wooden serving trays lies in the ability to personalize every aspect. You can choose the type of wood, the size and shape of the tray, the handles, and most importantly, the design. From intricate engravings and laser-cut patterns to hand-painted motifs and inlaid details, the options are truly limitless.

Choosing the Perfect Wood

The type of wood you select will influence the tray's appearance, durability, and feel. Popular choices include:

  • Walnut: Known for its rich, dark brown color and beautiful grain patterns. It's a durable wood that ages gracefully.
  • Cherry: Has warm, reddish-brown tones and a smooth, elegant finish. It's often used for furniture and high-end crafts.
  • Maple: Offers a light, creamy color and a fine, even grain. It's known for its strength and resistance to scratches.
  • Oak: A robust wood with a distinct grain pattern and a wide range of colors. It's durable and resistant to moisture.
  • Bamboo: A sustainable and eco-friendly option with a warm, natural aesthetic. It's lightweight and easy to work with.

Designing Your Own Style

This is where your creativity truly shines. Consider the following design elements:

  • Themes: Do you love nature, geometric patterns, or perhaps a specific historical period?
  • Personal Touches: Include your initials, a meaningful quote, or a family crest.
  • Colors: Choose a color palette that complements your home decor or a theme you're showcasing.
  • Handles: Select from various styles, including traditional, modern, or even unique shapes like hearts or flowers.

The Benefits of Custom Wooden Serving Trays

Beyond their aesthetic appeal, custom wooden serving trays offer several advantages:

  • Uniqueness: They are truly one-of-a-kind pieces, reflecting your individual taste and style.
  • Durability: Made from high-quality wood, they are built to last and withstand everyday use.
  • Sentimental Value: They serve as cherished keepsakes that can be passed down through generations.
  • Gift Ideas: They make exceptional gifts for housewarmings, weddings, or any special occasion.

Where to Find and Create Custom Wooden Serving Trays

Several avenues exist for acquiring or creating custom wooden serving trays:

  • Online Retailers: Many online stores specialize in handcrafted wooden trays. They often offer customization options and a wide range of designs.
  • Local Artisans: Seek out skilled woodworkers or artisans in your area. They can create personalized trays based on your specific requirements.
  • DIY Projects: If you're feeling ambitious, you can embark on a DIY project using wood working tools, plans, and materials. This allows you complete control over the design and finishing touches.

Conclusion: Elevate Your Serving Style

Custom wooden serving trays are more than just functional items; they are works of art that elevate any occasion. With their unique designs and personalized touches, they add a touch of warmth, elegance, and personality to your home and your life. Whether you choose to buy a ready-made tray or create your own, embrace the opportunity to make a statement with a piece that reflects your individual style and passion.

How to Build Modern Coffee Tables with Geometric and Abstract Shapes

How to Build Modern Coffee Tables with Geometric and Abstract Shapes

Building Modern Coffee Tables with Geometric and Abstract Shapes

In the realm of interior design, coffee tables stand as pivotal focal points, setting the tone for the overall aesthetic of a living space. Modern coffee tables, in particular, have gained immense popularity for their sleek lines, minimalist designs, and ability to seamlessly integrate with contemporary décor. By incorporating geometric and abstract shapes, these tables transcend mere functionality and transform into captivating works of art. This comprehensive guide will delve into the intricacies of crafting modern coffee tables with these captivating design elements, empowering you to create stunning statement pieces for your home.

Embracing Geometric Forms

Geometric shapes, renowned for their precision and mathematical elegance, lend themselves perfectly to the modern aesthetic. They evoke a sense of order, harmony, and sophistication, adding a touch of intellectualism to any space. When designing a geometric coffee table, consider the following forms:

Circles and Ovals

Circles and ovals exude a sense of fluidity and continuity. They can create a visually calming effect and foster a sense of intimacy. A circular coffee table can act as a central gathering point, inviting conversation and fostering a sense of unity. Alternatively, an oval table can create a more elongated and dynamic presence, adding a touch of visual interest to the room.

Squares and Rectangles

Squares and rectangles are classic geometric forms that radiate stability and structure. They provide a sense of groundedness and can serve as anchors in a room. A square coffee table offers a sense of balance and symmetry, while a rectangular table can create a more linear and streamlined look. Consider incorporating a unique edge treatment, such as a chamfered edge or a rounded corner, to add visual interest and soften the overall aesthetic.

Triangles

Triangles, with their sharp angles and dynamic energy, add a touch of boldness and intrigue. They can be incorporated into the table's legs or base, creating a visually striking and unexpected element. A triangular table can also create a sense of movement and dynamism, particularly when used in conjunction with other geometric shapes.

Exploring Abstract Shapes

Abstract shapes, free from the constraints of traditional geometry, allow for boundless creative expression. They offer a sense of freedom, playfulness, and artistic exploration, adding a unique dimension to any modern interior. Consider incorporating the following abstract shapes:

Freeform Curves

Freeform curves, characterized by their organic and flowing lines, introduce a sense of movement and dynamism. They can be used to create undulating tabletops or sculptural bases. When incorporated strategically, freeform curves can soften the angularity of geometric shapes, creating a more balanced and harmonious aesthetic.

Organic Forms

Organic forms, inspired by nature, often feature irregular shapes and textures. They evoke a sense of natural beauty, tranquility, and connection to the earth. A coffee table with an organic form can create a focal point that draws attention and sparks conversation. Consider incorporating materials like wood, stone, or metal with natural textures to enhance the organic feel.

Asymmetrical Designs

Asymmetrical designs challenge conventional notions of balance and symmetry, creating a sense of visual intrigue and unexpectedness. A coffee table with an asymmetrical design can add a touch of whimsy and personality to the room. Consider incorporating an asymmetrical tabletop with a geometric base or vice versa to create a visually engaging contrast.

Materials and Finishes

The choice of materials and finishes plays a crucial role in defining the overall aesthetic of a modern coffee table. Here are some popular options:

Wood

Wood remains a timeless material that brings warmth, natural beauty, and durability to any space. Consider using hardwoods like walnut, oak, or maple for their rich grains and durability. Alternatively, use softer woods like pine or cedar for a more rustic and organic feel.

Metal

Metal, with its sleek and industrial aesthetic, adds a touch of sophistication and modernity. Steel, aluminum, and brass are commonly used for their durability and versatility. Consider incorporating different metal finishes, such as polished chrome, brushed nickel, or antique brass, to add a touch of personality.

Glass

Glass, with its transparency and reflective qualities, creates a sense of lightness and openness. It can be used to create a tabletop that appears to float above the base or to showcase the underlying structure. Tempered glass is particularly durable and suitable for coffee tables.

Stone

Stone, with its natural textures and unique patterns, adds a touch of elegance and sophistication. Marble, granite, and limestone are popular choices for their durability and timeless beauty. Consider using stone in conjunction with other materials, such as metal or wood, to create a multi-faceted and visually captivating table.

Construction Techniques

The construction techniques employed will influence the stability, durability, and aesthetic of the coffee table. Here are some popular methods:

Frame and Panel Construction

Frame and panel construction involves creating a sturdy frame that supports a panel or tabletop. This method is commonly used for rectangular or square tables. It allows for the incorporation of different materials for the frame and panel, creating a visually interesting contrast.

Solid Wood Construction

Solid wood construction involves using a single piece of wood for the tabletop and legs. This method is ideal for creating a table with a rustic or organic feel. It can also be used to create tables with intricate carvings or designs.

Metal Fabrication

Metal fabrication techniques, such as welding, bending, and cutting, can be used to create unique and intricate metal frames or bases. This method allows for the creation of highly customized designs, including abstract and geometric shapes.

Finishing Touches

The finishing touches applied to a modern coffee table can elevate its visual appeal and enhance its overall aesthetic. Consider the following options:

Paint and Stain

Paint and stain can be used to transform the look and feel of a coffee table. Consider using a bold color to create a statement piece or a neutral shade to blend seamlessly with the surrounding décor. You can also use a variety of finishing techniques, such as distressing or antiquing, to add character and texture.

Metal Finishes

Metal finishes, such as polished chrome, brushed nickel, or antique brass, can add a touch of sophistication and elegance to a coffee table. Consider using a combination of different finishes to create a visually intriguing contrast.

Unique Hardware

Unique hardware, such as custom-designed knobs or drawer pulls, can add a touch of personality and sophistication to a coffee table. Consider incorporating hardware that complements the overall design and style of the table.

Conclusion

Building modern coffee tables with geometric and abstract shapes offers a unique opportunity to create stunning statement pieces for your home. By embracing the principles of modern design, incorporating a wide range of materials and finishes, and employing innovative construction techniques, you can craft tables that not only serve as practical furniture pieces but also as captivating works of art. Whether you opt for the precision of geometric forms or the freedom of abstract shapes, your coffee table will undoubtedly become a focal point that reflects your personal style and enhances the overall aesthetic of your living space.

How to Make Custom Wood Signs That Shoppers Love

How to Make Custom Wood Signs That Shoppers Love

How to Make Custom Wood Signs That Shoppers Love

In the realm of handcrafted goods, custom wood signs have emerged as a cherished and sought-after commodity. Their rustic charm, personalized messages, and enduring quality captivate shoppers, making them ideal for a myriad of applications, from home decor and gift-giving to business signage and special occasions. Embarking on the journey of crafting custom wood signs is not only a rewarding endeavor but also a lucrative prospect for artisans and entrepreneurs alike. This comprehensive guide delves into the art and science of creating custom wood signs that resonate with shoppers and leave a lasting impression.

The Art of Design: Crafting Captivating Visuals

The foundation of a compelling custom wood sign lies in its design. It is the visual language that speaks to shoppers, conveying a message, evoking an emotion, or simply adding a touch of rustic elegance to their surroundings. Mastering the art of sign design involves a harmonious blend of creativity, technical skill, and an understanding of aesthetic principles.

Choosing the Right Fonts and Typography

Fonts are the building blocks of a sign's message, and their selection plays a pivotal role in shaping its overall appeal. Opting for fonts that align with the sign's purpose and target audience is crucial. For instance, a vintage-inspired sign for a coffee shop might benefit from a script font, while a modern farmhouse sign might favor a clean, sans-serif typeface.

Consider these key factors when choosing fonts:

  • Legibility: The font should be easy to read from a distance, particularly for outdoor signs. Avoid overly ornate or decorative fonts that may hinder readability.
  • Style: The font's style should complement the overall aesthetic of the sign and the intended message. For example, a bold, sans-serif font can convey strength and authority, while a whimsical script font can evoke a sense of playfulness and charm.
  • Contrast: Ensure sufficient contrast between the font color and the background to enhance readability. Dark fonts on a light background or vice versa work well.

Embracing Color and Contrast

Color plays a vital role in establishing the sign's mood and capturing attention. A vibrant color palette can create a lively and inviting atmosphere, while muted tones can exude a sense of sophistication and tranquility.

When choosing colors, consider:

  • Brand Identity: If the sign is for a business, ensure the colors align with the brand's existing color scheme and identity.
  • Target Audience: The colors should appeal to the intended audience. For example, pastels might resonate with a young, feminine demographic, while bolder shades might appeal to a more mature or masculine audience.
  • Environmental Context: The surrounding environment can influence color choices. Signs placed in a lush garden might benefit from natural tones like green and brown, while those in a bustling urban setting might call for brighter, bolder colors.

Incorporating Graphics and Imagery

Graphics and imagery add visual interest and depth to custom wood signs. They can depict a logo, a symbolic image, or a decorative element that enhances the sign's message.

Key considerations for incorporating graphics and imagery:

  • Relevance: The imagery should be relevant to the sign's message and the intended audience.
  • Simplicity: Opt for simple graphics that are easily recognizable and avoid overly complex designs that might detract from the sign's overall aesthetic.
  • Style: The style of the graphics should complement the overall design of the sign. For example, a modern farmhouse sign might benefit from simple, geometric shapes, while a rustic sign might incorporate more organic and natural elements.

The Craft of Creation: Bringing Designs to Life

With the design finalized, it's time to translate the vision into a tangible masterpiece. The creation process involves a combination of technical skills, meticulous attention to detail, and a passion for crafting enduring works of art.

Selecting the Right Wood

Wood is the canvas upon which the sign's artistry unfolds. Choosing the appropriate wood type is paramount to achieving the desired aesthetic and ensuring the sign's longevity.

Consider these factors when selecting wood:

  • Appearance: Different wood types have distinct grain patterns, textures, and colors. Pine, cedar, and redwood are known for their rustic charm, while walnut and mahogany exude a sense of elegance and sophistication.
  • Durability: Hardwoods like oak and maple are known for their strength and resistance to wear and tear. These woods are well-suited for outdoor signs that are exposed to the elements. Softwoods like pine and cedar are more susceptible to damage but can be protected with finishes.
  • Availability: The availability of specific wood types varies depending on location and season. Consider the accessibility of the wood you choose to avoid delays in the creation process.

Preparing the Wood Surface

Before applying paint or stain, the wood surface must be meticulously prepared to ensure a smooth, even finish. This involves sanding, cleaning, and priming.

Essential steps in wood preparation:

  • Sanding: Sand the wood surface with progressively finer grit sandpaper to create a smooth finish. Sanding removes imperfections, reduces grain raise, and prepares the surface for paint or stain.
  • Cleaning: Remove dust and debris from the sanded surface using a damp cloth. Allow the wood to dry completely before proceeding to the next step.
  • Priming: Apply a primer to the wood surface to create a barrier between the wood and the paint or stain. A primer helps to ensure a uniform finish and prevents the wood from absorbing the paint or stain unevenly.

Applying Paint and Stain

The choice between paint and stain depends on the desired aesthetic and the sign's intended use.

  • Paint: Paint provides a solid, opaque finish that can be used to create bold colors and intricate designs. Acrylic paint is a popular choice for wood signs due to its quick drying time and ease of use.
  • Stain: Stain penetrates the wood surface, enhancing its natural grain patterns and colors. Stains are available in a wide range of colors and can be used to create rustic or antique finishes.

Regardless of the chosen medium, applying paint or stain requires patience and precision.

Tips for successful paint and stain application:

  • Use quality brushes or rollers: Invest in high-quality brushes or rollers that are designed for the chosen medium. This will ensure a smooth, even application and prevent streaking.
  • Apply thin coats: Apply multiple thin coats of paint or stain rather than one thick coat. This allows the medium to penetrate the surface evenly and prevents dripping or runs.
  • Allow ample drying time: Allow each coat of paint or stain to dry completely before applying the next. This ensures a smooth, even finish and prevents cracking or peeling.

Adding Final Touches

Once the paint or stain has dried, the final touches can transform the sign into a true masterpiece. This may involve adding decorative elements, protective coatings, or hardware.

Tips for adding finishing touches:

  • Distressing: Distressing a sign can create a vintage or antique look. This involves sanding, chipping, or scraping the paint or stain to reveal the underlying wood.
  • Adding embellishments: Embellishments can include stencils, decoupage, iron-on vinyl, or other decorative elements.
  • Protective coating: Apply a protective coating such as polyurethane or varnish to seal the surface and protect it from moisture, scratches, and UV rays. This is particularly important for outdoor signs.
  • Hardware: Add hardware like hooks, brackets, or hangers to facilitate mounting or display.

Marketing and Promotion: Reaching Your Target Audience

Crafting exceptional custom wood signs is only part of the equation. To achieve success in the competitive market, effective marketing and promotion are essential. This involves connecting with your target audience, showcasing your artistry, and building a loyal customer base.

Establishing an Online Presence

In today's digital age, an online presence is indispensable for any artisan or entrepreneur. Create a website or utilize online platforms like Etsy, Shopify, or social media to showcase your work, share your creative process, and connect with potential customers.

Tips for building an effective online presence:

  • High-quality photography: Capture professional photographs of your signs that showcase their beauty and craftsmanship. Use natural lighting and a clean background to highlight the details.
  • Compelling descriptions: Write engaging and informative descriptions that highlight the unique features of your signs, their craftsmanship, and the materials used.
  • Social media engagement: Actively engage with your audience on social media platforms like Instagram, Facebook, or Pinterest. Share behind-the-scenes glimpses of your creative process, post customer testimonials, and run contests or giveaways.

Engaging in Local Events and Markets

Participating in local craft fairs, farmers' markets, and community events provides an excellent opportunity to connect directly with potential customers, showcase your work in person, and build relationships.

Tips for success at local events:

  • Professional booth display: Create a visually appealing and inviting booth that effectively showcases your signs. Use high-quality displays, lighting, and signage.
  • Personalized interaction: Engage with customers in a friendly and approachable manner. Be prepared to discuss your creative process, answer questions, and provide personalized recommendations.
  • Networking opportunities: Take advantage of networking opportunities to connect with other artisans, local businesses, and community members. Build relationships that can lead to collaborations, referrals, and increased visibility.

Word-of-Mouth Marketing

Word-of-mouth marketing can be incredibly powerful. Encourage satisfied customers to share their experiences with friends, family, and online communities. Offer incentives like discounts or referral programs to motivate customers to spread the word about your business.

Conclusion

Creating custom wood signs that shoppers love is an art form that combines technical skill, creative vision, and an understanding of what resonates with customers. By mastering the design process, embracing the craft of creation, and implementing effective marketing strategies, artisans and entrepreneurs can carve out a niche in this thriving market, turning their passion for woodworking into a successful and rewarding venture.

Wooden Key Rack Projects with Storage for Hats, Coats, and More

Wooden Key Rack Projects with Storage for Hats, Coats, and More

Say Goodbye to Clutter: Wooden Key Rack Projects with Storage for Hats, Coats, and More!

Tired of searching for your keys every morning? Does your entryway look like a tornado hit it? It's time to tackle that chaotic corner with a stylish and functional wooden key rack project! Not only will you have a designated place for your keys, but you can also create a dedicated space for your hats, coats, and other entryway essentials.

The best part? Building a wooden key rack is a surprisingly easy project that even beginners can tackle. With some basic woodworking skills and a little creativity, you can transform your entryway from a clutter zone into a welcoming haven. So grab your tools, put on your favorite playlist, and let's get started!

Planning Your Wooden Key Rack Project

Before you dive into sawing and sanding, it's crucial to plan your project. This will ensure you have the right materials and tools, and that your final product fits perfectly in your entryway.

What to Consider Before You Start

  • Space: Measure the available wall space in your entryway. This will determine the size and shape of your key rack.
  • Storage Needs: Think about what you want to store besides keys. Do you need hooks for coats and bags, shelves for hats, or a cubby for shoes?
  • Style: Consider the overall style of your home. Do you want a rustic, modern, or farmhouse-inspired key rack?
  • Budget: Set a budget for your project. You can find affordable wood at local lumberyards or even use reclaimed wood for a unique look.

Essential Materials for Your Wooden Key Rack

Here are some of the basic materials you'll need:

  • Wood: Pine, oak, maple, and walnut are popular choices for key racks. Consider using plywood for shelves or backing if you're working with a smaller piece of wood.
  • Hardware: You'll need hooks for hanging keys, coats, and bags. Choose sturdy hooks in a style that complements your design. You may also need hinges, screws, nails, and wood glue.
  • Finishing Supplies: Sandpaper, wood stain or paint, and a sealant will give your key rack a beautiful and protective finish.

Key Rack Design Ideas

The beauty of woodworking is that you can customize your project to suit your style and needs. Here are some popular design ideas to inspire you:

Classic Key Rack with Hooks

This simple design is perfect for beginners. Cut a piece of wood into the desired length and width, and then add hooks along the bottom. You can also create a small shelf on top for storing keys or other small items.

Key Rack with Storage Shelf

This design adds functionality with a shelf for hats, gloves, or mail. Create a simple shelf above the hooks or build a more elaborate shelf with a back to create a small cubby for shoes.

Key Rack with Coat Hooks

This is a great option for smaller entryways. Combine coat hooks with key hooks to create a functional storage solution. Consider a vertical design with hooks and a shelf at the top.

Rustic Key Rack with Reclaimed Wood

Add a touch of charm to your entryway with a key rack made from reclaimed wood. This rustic look can be achieved with reclaimed barn wood, pallet wood, or even repurposed furniture pieces.

Modern Key Rack with Minimalist Design

For a contemporary feel, create a sleek and minimalist key rack. Use a simple shape, like a rectangle or circle, and choose sleek hardware.

Step-by-Step Instructions for a Simple Key Rack

Let's build a basic key rack with hooks and a small shelf. This project is perfect for beginners and can be adapted to fit your style.

Materials:

  • 1 x 12 inch board (length depends on your desired width)
  • 6-8 sturdy hooks
  • Screws for attaching hooks
  • Wood glue
  • Sandpaper (various grits)
  • Wood stain or paint (optional)
  • Sealant (optional)
  • Measuring tape
  • Pencil
  • Saw (hand saw or circular saw)
  • Drill
  • Level

Instructions:

  1. Cut the wood to size. Measure the desired width of your key rack and use a saw to cut the board to length.
  2. Sand the wood. Sand the wood smooth with sandpaper, starting with a coarser grit and then moving to a finer grit. This will remove any rough edges and create a smooth surface for your finish.
  3. Mark hook locations. Using a measuring tape and pencil, mark the locations for your hooks. Space the hooks evenly along the bottom of the board.
  4. Drill pilot holes. Drill pilot holes for the screws that will hold the hooks. This will prevent the wood from splitting when you screw in the hooks.
  5. Attach the hooks. Screw the hooks into the pilot holes, making sure they are securely fastened.
  6. Apply wood stain or paint. If desired, apply a stain or paint to the wood. Let the finish dry completely before moving on.
  7. Apply sealant. If you want to protect your key rack from scratches and spills, apply a sealant. This will also enhance the beauty of the wood.
  8. Mount the key rack. Use screws or a mounting bracket to securely attach the key rack to your wall. Make sure it is level before you attach it.

Finishing Touches: Adding Personality to Your Key Rack

Once your basic key rack is built, it's time to add your personal touch. Here are some ideas to make your key rack unique:

  • Decorative Hardware: Choose decorative hooks in a style that complements your design. You can find hooks in a variety of materials like metal, ceramic, or wood.
  • Engraving: Add a personal touch by engraving your initials or a special message on the wood.
  • Add a Storage Basket: Use a small basket or tray to hold keys, mail, or other small items. This can be placed on a shelf or attached to the key rack with brackets.
  • Lighting: Add a small light fixture near your key rack to make it easier to find your keys in the evening.
  • Plants: A small potted plant or succulent placed near the key rack can add a touch of life and color to your entryway.

More Wooden Key Rack Projects

Feeling ambitious? Once you've mastered the basics, explore these more advanced projects:

  • Key Rack with Coat Rack and Shoe Shelf: Combine a key rack, coat rack, and shoe shelf into one functional storage unit.
  • Floating Key Rack: Create a floating key rack with a shelf and hooks attached to the wall with brackets. This design is modern and space-saving.
  • Key Rack with Mirror: Add a mirror to your key rack to create a functional and stylish focal point in your entryway.

Enjoy Your New Wooden Key Rack!

Congratulations! You've created a beautiful and functional wooden key rack that will help you organize your entryway and keep your keys within easy reach. As you gain experience, you can experiment with more complex designs and techniques. The possibilities are endless, so let your creativity soar!

How to Build a Wooden Plant Stand with a Minimalist Aesthetic

How to Build a Wooden Plant Stand with a Minimalist Aesthetic

Building a Minimalist Wooden Plant Stand: A Step-by-Step Guide

Hey there, plant lovers! Are you tired of seeing your beloved greenery crammed on windowsills or awkwardly perched on furniture? It's time to elevate your plant game with a stylish and functional wooden plant stand. Not only will it add a touch of minimalist chic to your space, but it'll also make your plants the stars of the show.

Don't worry if you're not a seasoned woodworker. This DIY project is surprisingly easy and doesn't require a ton of fancy tools. We'll walk through the steps together, and by the end, you'll have a stunning plant stand that you can proudly display in your home. Let's get started!

Gather Your Materials and Tools

First things first, we need to get our hands on the essentials. Here's a shopping list to help you get started:

Materials

  • Wood: You can choose from various wood types, such as pine, cedar, or oak, based on your preference and budget. We'll use 1x6 boards for this project, but feel free to adjust the dimensions based on the size you desire.
  • Wood glue: A good quality wood glue is essential for strong and durable joints.
  • Wood screws: Choose screws that are long enough to securely fasten the pieces of wood together.
  • Wood stain (optional): This is for adding a beautiful finish to your plant stand. Choose a stain that complements your décor.
  • Wood sealant (optional): A sealant protects the wood from scratches and spills, extending its life.
  • Sandpaper (various grits): This is for smoothing out the wood and creating a smooth finish.

Tools

  • Miter saw or circular saw: For precise cuts.
  • Measuring tape and pencil: For marking cuts and dimensions.
  • Clamps: To hold the wood pieces together while gluing.
  • Drill: For drilling pilot holes and attaching screws.
  • Screwdriver: To tighten the screws.
  • Safety glasses: Always protect your eyes when working with wood.

Designing Your Minimalist Plant Stand

Now, let's get creative! The beauty of a minimalist plant stand lies in its simplicity. You can choose from various designs, but the key is to keep things clean and clutter-free. Here are a few ideas:

Simple Shelf Design

This design features a single, sturdy shelf. It's perfect for showcasing a large potted plant or grouping smaller pots together. The shelf can be rectangular, square, or even circular, depending on your preference.

Stacked Shelf Design

For multiple plants, consider a stacked shelf design. Two or three shelves provide ample space for your leafy friends while maintaining a minimalist aesthetic. You can choose varying shelf heights to accommodate different plant sizes.

Tripod Design

Want to add a touch of whimsy? Try a tripod design! Three legs create a sturdy base, while a single shelf sits on top, perfect for showcasing your favorite plant. This design is perfect for adding a modern vibe to your space.

Cutting the Wood

Once you've finalized your design, it's time to cut the wood. Using your miter saw or circular saw, measure and mark the wood according to your design plans. Be precise with your cuts for a professional-looking finish.

Remember, safety first! Wear safety glasses while cutting wood. Don't rush the process and take your time to ensure clean and accurate cuts. If you're new to cutting wood, practice on scrap pieces before working with your final wood.

Assembling the Plant Stand

With your wood pieces cut, it's time to bring your plant stand to life!

Gluing and Clamping

Start by applying a thin layer of wood glue to the surfaces you want to join. Make sure the glue is evenly distributed. Then, carefully clamp the pieces together, ensuring they're aligned properly. Use multiple clamps to provide adequate pressure and hold the pieces securely in place.

Allow the glue to dry completely according to the manufacturer's instructions. This typically takes about 24 hours. Don't rush this step, as allowing the glue to dry properly ensures a strong and durable bond.

Drilling Pilot Holes and Securing with Screws

Once the glue has dried, drill pilot holes through the wood to prevent splitting. The pilot holes should be slightly smaller than the diameter of your screws. This helps guide the screws and prevent them from damaging the wood.

Now, attach the pieces of wood together with screws. Drive the screws in with a screwdriver, making sure they are securely fastened.

Finishing Touches

Your plant stand is almost complete! It's time to add those final touches to make it truly shine.

Sanding

Sanding smooths out the surface of the wood and creates a beautiful finish. Start with coarse-grit sandpaper to remove any rough edges. Then, gradually move to finer grit sandpaper to achieve a smooth and even finish. Remember to sand in the direction of the wood grain for best results.

Staining and Sealing (Optional)

To add a touch of color and protection, you can stain and seal your plant stand. Apply the stain evenly with a brush or cloth, following the manufacturer's instructions. Allow the stain to dry completely before applying the sealant.

The sealant creates a protective barrier against scratches, spills, and moisture. It also enhances the wood's natural beauty, giving it a polished look. Apply the sealant with a brush or cloth, following the manufacturer's instructions.

Your Beautiful Minimalist Plant Stand

Congratulations! You've successfully built a stunning minimalist plant stand that will elevate your home décor and make your plants the stars of the show! Now, take a moment to admire your handiwork and enjoy the pride of creating something beautiful with your own two hands.

Don't be afraid to experiment with different designs and finishes to create a plant stand that truly reflects your unique style. Have fun, get creative, and let your inner plant parent shine!

How to Build Wooden Outdoor Benches with a Minimalist or Contemporary Design

How to Build Wooden Outdoor Benches with a Minimalist or Contemporary Design

Crafting Minimalist Wooden Benches for Your Outdoor Oasis

Hey there, fellow outdoor enthusiasts! Are you looking to add some sleek, stylish seating to your backyard, patio, or deck? Look no further, because we're about to dive into building your very own minimalist wooden benches, perfect for creating a serene and contemporary vibe. No need to be intimidated by the task; we'll break down the process step-by-step, making it a breeze to build these beautiful, functional pieces.

Choosing the Right Materials

Before we get our hands dirty, let's talk about the materials you'll need. Think of it like choosing your perfect outfit; the right fabric, cut, and style can make all the difference.

The Wood:

* **Hardwoods like Oak or Maple:** These will give your benches a robust, timeless look and stand up to the elements. They're a bit pricier, but totally worth it for their durability and classic feel. * **Softwoods like Pine or Cedar:** These are budget-friendly options with a rustic charm. Cedar is naturally resistant to rot and insects, making it a great choice for outdoor furniture. * **Treated Lumber:** If you're going for a more affordable option, treated lumber is perfect. It's designed to withstand moisture and decay, but remember, it may not be as visually appealing as natural hardwoods.

The Hardware:

* **Screws:** Use stainless steel screws to prevent rust and corrosion. Go for deck screws for extra holding power. * **Wood Glue:** This helps create a strong bond between the wood pieces. * **Finishing Products:** You'll want to protect your benches from the elements. Choose a sealant or paint that's suitable for outdoor use.

Design Inspiration: Minimalism and Contemporary Style

Now, let's talk about the design. Minimalism and contemporary styles are all about clean lines, simplicity, and functionality. Here are some key elements to keep in mind: * **Straight Lines:** Avoid curves and fancy embellishments. Think straight, simple forms for a minimalist look. * **Natural Wood Finish:** Embrace the natural beauty of the wood. A clear sealant will highlight the grain and texture. * **Sleek Profile:** Keep the overall design sleek and low-profile, avoiding bulky details. * **Simple Legs:** Choose simple, straight legs that complement the clean lines of the bench. * **Minimal Hardware:** Use hidden fasteners or screws to create a seamless look.

Step-by-Step Construction Guide

Ready to get building? Here's a step-by-step guide to create your minimalist wooden benches:

Step 1: Cut the Wood

Start by cutting your lumber to size. Use a saw or a miter saw for precise cuts. You'll need:

  • Two long boards for the seat
  • Two shorter boards for the back
  • Four pieces for the legs, matching the height you desire.

Measure twice, cut once! Always double-check your measurements to ensure a perfect fit.

Step 2: Assemble the Seat

Lay the two long boards flat, side-by-side, to form the seat. Use wood glue and screws to secure them together, creating a strong and stable foundation.

Step 3: Attach the Back

Now, it's time to add the back. Position the shorter boards at the desired angle for the backrest, and attach them to the seat using wood glue and screws. Make sure the angle is comfortable and provides good support.

Step 4: Attach the Legs

Choose the position for your legs. For a minimalist aesthetic, you can attach them directly to the seat and back, or you can add a separate frame for a more robust construction.

If you're going for a direct attachment, place the leg boards at the corners, aligning them with the seat and back. Use wood glue and screws to secure them in place.

If you prefer a frame, create a simple frame by joining four pieces of lumber to form a rectangle. Then, attach the legs to the frame, and finally, secure the frame to the seat and back.

Step 5: Sand and Finish

Congratulations! You've built your benches! Now it's time for the finishing touches. Sand down any rough edges or imperfections with sandpaper, starting with a coarser grit and gradually moving to a finer grit for a smooth finish.

To protect your benches from the elements, apply a sealant or paint. You can choose a clear sealant to highlight the natural wood grain or opt for a stain or paint to add a splash of color. Make sure the finish is suitable for outdoor use.

Tips for a Polished Look

Here are a few tips for elevating your minimalist bench design:

  • **Use a simple, clean-lined design for the legs.** Think straight, tapered, or slightly angled legs.
  • **Choose a natural wood finish for a minimalist look.** A clear sealant or a light stain will enhance the natural beauty of the wood.
  • **Use hidden fasteners whenever possible.** This will give your benches a sleek, seamless appearance.
  • **Consider adding subtle details.** You can incorporate a small, simple cutout in the back or add a slightly rounded edge to the seat for a touch of visual interest.
  • **Make sure your benches are comfortable and inviting.** The seat should be wide enough for two people to sit comfortably, and the backrest should provide adequate support.

Final Thoughts

Creating your own minimalist wooden benches is a rewarding experience that lets you personalize your outdoor space. With a bit of planning, careful cutting, and a little bit of creativity, you'll be crafting stunning, functional pieces that you'll enjoy for years to come.

So, gather your tools, choose your wood, and get ready to build! Your outdoor oasis awaits.

Celebrate Life's Moments with Wooden Gifts

Celebrate Life's Moments with Wooden Gifts

Celebrate Life's Moments with Wooden Gifts

In the tapestry of life, moments weave intricate patterns, each thread imbued with significance and emotion. From joyous occasions to quiet milestones, these moments deserve to be cherished and celebrated. While a myriad of gift options exists, wooden gifts possess an inherent warmth and enduring quality that makes them particularly suitable for commemorating life's precious events.

Wooden gifts transcend mere material possessions; they embody the spirit of nature, whispering tales of timelessness and craftsmanship. The grain patterns, knots, and color variations are unique to each piece, reflecting the individual beauty of the tree from which it originated. Their tactile nature invites touch, creating a connection that resonates deeply within us. When we gift wood, we bestow more than just an object; we offer a piece of nature's artistry, a symbol of resilience and growth.

The Enduring Appeal of Wooden Gifts

The appeal of wooden gifts lies in their versatility, durability, and inherent beauty. They gracefully adapt to a range of occasions, from intimate gatherings to grand celebrations. The timeless elegance of wood complements any aesthetic, seamlessly blending into both modern and traditional settings.

Versatility: A Gift for Every Occasion

Wooden gifts transcend the boundaries of specific occasions, effortlessly transitioning from celebratory events to everyday expressions of affection. For birthdays, consider personalized wooden ornaments, engraved picture frames, or handcrafted wooden jewelry boxes. For anniversaries, a vintage-inspired wooden clock or a hand-carved wooden sculpture can symbolize the enduring nature of your commitment.

Graduations call for thoughtful gifts that acknowledge the achievements and aspirations of the graduate. A customized wooden desk organizer or a beautifully crafted wooden pen set can inspire and empower the recipient in their future endeavors. Weddings, with their promise of a lifetime together, deserve enduring gifts, such as wooden keepsake boxes, engraved cutting boards, or timeless wooden picture frames.

Durability: A Gift That Lasts

Wooden gifts possess an inherent durability that sets them apart from fleeting trends. Their solid construction and natural resistance to wear and tear ensure that they will be cherished for generations to come. A well-crafted wooden box, for instance, can hold precious memories and heirlooms, its story unfolding with each passing year.

Beauty: A Gift That Inspires

The beauty of wood lies in its natural artistry. Each piece reveals a unique grain pattern, knots, and color variations, creating a visual tapestry that captures the essence of nature. Whether polished to a smooth sheen or left in its natural state, the texture of wood invites touch, evoking a sense of warmth and connection. A wooden sculpture, for instance, can become a conversation starter, its intricate details and graceful curves adding a touch of elegance to any space.

Types of Wooden Gifts for Every Occasion

The world of wooden gifts is diverse, offering a plethora of options to suit various tastes and preferences.

Personalized Gifts

Personalized wooden gifts are particularly meaningful, adding a personal touch that elevates the gesture. Engraved wooden photo frames, for instance, can display treasured memories, while custom-made wooden jewelry boxes can hold precious trinkets and keepsakes. Engraved wooden cutting boards, adorned with names, dates, or special messages, become cherished family heirlooms.

Functional Gifts

Wooden gifts can seamlessly blend practicality and aesthetics, making them ideal for everyday use. Wooden kitchen utensils, such as rolling pins, spatulas, and cutting boards, add a touch of warmth and charm to culinary endeavors. A sturdy wooden tray, meticulously crafted and beautifully finished, can serve as a stylish centerpiece for serving tea or cocktails.

Decorative Gifts

Wooden gifts can enhance the ambiance of any space, adding a touch of rustic charm or modern sophistication. Hand-carved wooden sculptures, intricate in detail and graceful in form, can become focal points in any room. Wooden picture frames, with their timeless elegance, showcase cherished photographs and artwork.

The Art of Giving Wooden Gifts

Gifting wood is not just about the object; it is about conveying emotions and creating lasting memories. The choice of wood, the craftsmanship, and the personal touch you bring to the gift are all crucial elements in expressing your sentiment. The presentation is equally important, enhancing the overall impact of the gift.

Consider packaging the wooden gift in a natural fabric, such as linen or burlap, to emphasize the connection to nature. A handwritten note, expressing your love and appreciation, adds a heartfelt touch. Deliver the gift in person whenever possible, allowing you to share the joy of giving and receive the recipient's gratitude in real time.

Beyond the Gift: Sustainable Practices

The beauty of wooden gifts is further enhanced when they are sourced sustainably. Choosing gifts made from responsibly managed forests ensures that future generations will have access to the beauty and benefits of wood. Look for certifications such as the Forest Stewardship Council (FSC) label, which guarantees that the wood used in the product comes from well-managed forests.

Celebrating life's moments with wooden gifts is more than just a trend; it is a conscious choice that honors the Earth's resources while creating lasting memories. With every wooden gift, we express our gratitude for the wonders of nature and our commitment to celebrating life's precious moments in a meaningful and sustainable way.

One-Day Woodworking Projects for Novices

One-Day Woodworking Projects for Novices

One-Day Woodworking Projects for Novices

Embarking on woodworking can be an immensely fulfilling experience, allowing you to craft practical and aesthetically pleasing objects from scratch. While larger projects may seem daunting for beginners, a plethora of one-day woodworking projects offer a fantastic entry point into the world of woodworking. These projects are designed to be achievable within a single day, fostering confidence and encouraging continued exploration.

Choosing Your First Project

Selecting the right project is crucial for a successful and enjoyable woodworking experience. When choosing your first project, consider the following factors:

Skill Level and Time Commitment

As a novice, it is prudent to start with simple projects that demand minimal tools and skills. These projects will allow you to familiarize yourself with basic woodworking techniques without overwhelming you.

Material Selection

Wood types vary greatly in terms of their workability and aesthetics. Softwoods like pine and cedar are generally easier to work with for beginners, while hardwoods like oak and maple require more experience and specialized tools.

Project Size and Complexity

Small to medium-sized projects are ideal for one-day endeavors. Avoid projects that involve intricate joinery or excessive cutting, as these can significantly increase the time and effort required.

Essential Tools for Beginners

While woodworking projects can range in complexity and tool requirements, a basic set of tools is essential for most beginner-friendly projects. These tools will serve as your foundation, providing the means to cut, shape, and assemble your creations.

Hand Tools

  • Measuring Tape: Precisely measure and mark wood for cutting and shaping.
  • Pencil: Mark the wood for cuts and other details.
  • Combination Square: Create precise 90-degree angles and measure lengths.
  • Hand Saw: Cut wood to length and shape. Choose a saw with a fine tooth count for cleaner cuts.
  • Chisel Set: Shape and refine wood surfaces. Start with a basic set that includes various sizes.
  • Mallet: Drive chisels and other tools without damaging the wood.
  • Clamps: Secure wood pieces together for assembly and gluing.
  • Sandpaper: Smooth out rough edges and surfaces. Use a variety of grits for different levels of sanding.

Power Tools

  • Power Drill: Drill holes for fasteners and other applications. Choose a cordless drill for mobility.
  • Jigsaw: Cut intricate shapes and curves in wood. A jigsaw with variable speed and a blade guide will be helpful.
  • Random Orbital Sander: Sand surfaces quickly and efficiently. Choose a model with dust collection for a cleaner workspace.

One-Day Woodworking Project Ideas

Once you have assembled your basic tools and have a general understanding of woodworking principles, you are ready to tackle your first one-day project. Here are a few beginner-friendly ideas that can be completed within a single day:

Simple Shelves

Shelves offer a practical and versatile woodworking project for beginners. They can be used to organize books, display decorative items, or store tools.

  • Materials: Wooden boards, screws, wood glue, stain or paint (optional)
  • Instructions: Cut the boards to the desired dimensions, assemble the shelf unit using wood glue and screws, sand the finished product, and apply stain or paint if desired.

Wooden Coasters

Coasters are an excellent choice for novice woodworkers as they involve relatively small pieces of wood and simple cutting techniques.

  • Materials: Scrap wood, sandpaper, polyurethane finish (optional), cork sheet (optional)
  • Instructions: Cut squares or circles from the scrap wood, sand the edges, and apply a polyurethane finish for protection. You can also attach cork sheet to the bottom of the coasters for added durability.

Wooden Cutting Board

A cutting board is a practical and useful kitchen item that is relatively simple to make.

  • Materials: Hardwood board, food-safe oil or finish, mineral oil (optional)
  • Instructions: Cut the hardwood board to the desired size and shape, sand the surface thoroughly, and apply a food-safe oil or finish. You can also apply mineral oil periodically to maintain the board's condition.

Birdhouse

Birdhouses are a classic woodworking project that offers a fun and rewarding experience.

  • Materials: Wooden boards, screws, wood glue, paint or stain (optional)
  • Instructions: Cut the boards to the specified dimensions, assemble the birdhouse using wood glue and screws, sand the finished product, and apply paint or stain if desired.

Wooden Toy Box

A toy box is a great way to add storage and whimsy to a child's room. It is a slightly more complex project than the others but can still be completed in a day.

  • Materials: Wooden boards, screws, wood glue, hinges, paint or stain (optional)
  • Instructions: Cut the boards to the desired dimensions, assemble the toy box using wood glue and screws, attach hinges to the lid, sand the finished product, and apply paint or stain if desired.

Safety Precautions

Woodworking can be a rewarding hobby, but it is essential to prioritize safety throughout the process.

Use Proper Eye Protection

Wear safety glasses or goggles at all times to protect your eyes from flying debris or sawdust.

Wear Hearing Protection

Use earplugs or earmuffs to protect your hearing from the noise of power tools.

Maintain a Clean Work Area

Keep your work area clutter-free to prevent accidents and ensure you have ample space to move around safely.

Use Tools Correctly

Read the instructions for each tool carefully and ensure you understand how to use it safely.

Be Aware of Sharp Edges and Tools

Handle sharp tools with care and always be aware of their location. Keep tools properly stored when not in use.

Conclusion

One-day woodworking projects offer a fantastic way to dip your toes into this fulfilling craft. They are designed to be achievable for beginners, allowing you to learn fundamental woodworking techniques and build confidence. Remember to prioritize safety, select the right project for your skill level, and enjoy the process of creating something beautiful and functional with your hands.

Beautiful Wood Floating Shelves for Modern Interiors

Beautiful Wood Floating Shelves for Modern Interiors

Beautiful Wood Floating Shelves for Modern Interiors

Let's face it, sometimes you just need a little extra storage space. But who wants to clutter up their beautiful modern interior with bulky cabinets? That's where beautiful wood floating shelves come in! They're a stylish and functional addition to any room, blending seamlessly with the clean lines and minimalist aesthetic of contemporary design.

Think of them as a blank canvas, a perfect backdrop for showcasing your favorite books, plants, artwork, or even a collection of vintage records. They add depth and visual interest, breaking up the monotony of a wall and turning it into a personal gallery.

But the beauty of floating shelves goes beyond just looks. They also offer a ton of practical benefits:

  • They save valuable floor space.
  • They create a sense of openness and airiness in the room.
  • They're incredibly versatile, working in any room of the house, from the living room to the bedroom to the kitchen.

Types of Wood for Floating Shelves

When choosing wood for your floating shelves, you have a wealth of options to suit your style and budget. Here's a breakdown of some popular choices:

Oak

Known for its durability and warm, inviting tones, oak is a classic choice for floating shelves. It comes in various grains and finishes, from rustic to contemporary, offering a wide range of looks to complement your decor.

Walnut

Walnut is a luxurious choice that adds a touch of sophistication to any room. Its rich, dark brown color and distinctive grain pattern make it a statement piece.

Maple

Maple is a lighter wood that brings a sense of brightness and freshness to a space. It's known for its smooth, even grain and can be stained in various shades, from warm honey to deep chocolate.

Cherry

Cherry wood is a popular choice for its rich, reddish-brown hue and beautiful grain pattern. Over time, it develops a beautiful patina that adds depth and character.

Pine

Pine is a softwood that's known for its affordability and knotty, rustic look. It's a great choice for a farmhouse or cottage-style interior.

Styling Tips for Floating Shelves

Now that you've chosen the perfect wood for your floating shelves, it's time to get creative with styling. Here are a few tips to help you create a stunning and functional display:

Create a Focal Point

Use your shelves to draw attention to a particular area of the room. For example, you could create a gallery wall with artwork, photographs, and mirrors, or you could create a reading nook with books, plants, and a cozy throw blanket.

Play with Height

Don't be afraid to mix and match shelf heights to add visual interest. For example, you could have two shelves at the same height, then a third shelf that's slightly higher or lower.

Embrace Asymmetry

Balance isn't always necessary. Try arranging your items in an asymmetrical pattern to create a more dynamic and interesting display.

Add Variety with Textures

Mix and match materials to add depth and dimension to your shelves. You could combine smooth ceramic vases with textured baskets, or pair polished metal sculptures with soft, woven textiles.

Use Light to Highlight

Strategic lighting can make all the difference in showcasing your shelves. Use spotlights or sconces to highlight your favorite objects and create a sense of warmth and ambience.

Where to Use Floating Shelves

The possibilities are endless when it comes to using floating shelves in your home. Here are some ideas to get you started:

Living Room

Floating shelves are a great way to add storage and display in your living room. Use them to showcase your favorite books, plants, and artwork. You can also use them to create a media center for your television or stereo system.

Bedroom

Floating shelves are perfect for creating a cozy and inviting bedroom. Use them to display your favorite books, photographs, and decorative items. You can also use them to store bedside essentials like reading lamps, alarm clocks, and glasses of water.

Kitchen

Floating shelves in the kitchen can help you organize your spices, cookbooks, and other kitchen essentials. They can also add a touch of warmth and elegance to your kitchen design.

Bathroom

Floating shelves can add a touch of modern sophistication to your bathroom. Use them to store towels, toiletries, and decorative items.

Office

Floating shelves are a practical and stylish addition to any office. Use them to store books, folders, and other office supplies.

Conclusion

Beautiful wood floating shelves are a versatile and stylish solution for adding storage and display to any room in your home. Whether you're looking for a way to showcase your favorite collectibles or just need a little extra space, floating shelves are a perfect choice. They're a simple yet effective way to elevate your home decor and create a more functional and beautiful space.